Originally written by Moriyaism, with help from Komogra, BeckTheHam, Vyro, Unloved, Gimmick, Tala, Remnant
Introduction
This guide is going to focus on the current optimal methods to progress in E7, if you wanna do stuff your own way then go ahead. It’s a game so do whatever gives you the most enjoyment.
Video version of this guide can be found here.
Stream VODs here if anyone wants to see the full gameplay to follow along
Streams here on YouTube and Twitch for anyone who wants full gameplay.
The early portion of this guide will focus on directing you towards clearing Wyvern Hell difficulty. Wyvern is where you will get started on farming gear to get through the rest of the game, so it is important to get it done asap in order to gear them. The game provides you with nearly all the units and gear you need to clear it.
I’m gonna use abbreviations a lot, but I’ll generally say the full name the first time and put the abbreviation in parenthesis next to it. Here are two you should know now:
Player vs Environment (PvE) - any content where you don’t fight teams made by other players.
Player vs Player (PvP) - Arena, Guild War, World Arena
General Tips
Getting Information
-
Discord
If you didn’t come from the Epic7 Discord, there is a channel in the official Discord for this game called “Guidance Grounds” where you can ask questions and get answers quickly. There are many guides in the “Community Guides” channel in the Discord as well, though I’ll be linking any necessary guides in their relevant sections as well. -
Help Menu
You can find a lot of info about the game’s mechanics via the “Help” menu in-game. The fastest way to access this menu from the Lobby is to tap on your Battle icon then tap on the ? button at the top left. I recommend at least reading through the “Combat Guide” section of this menu. This will explain most of the in-game mechanics and is pretty useful even for older players. One thing that isn’t explained is how the enemy units in PvP choose to target units which I’ll explain in the mid game Arena section.You’ll find this ? button in a lot of places so if you’re ever confused you can check it out. Side note, the in-game Hero Ratings are absolutely useless since the people that use this function have no idea what they’re talking about. -
Epic7x is trash, Ceciliabot is the best alternative.
The best online resources available are the guides in the Epic7 Official Discord and https://ceciliabot.github.io/#/ for hero/artifact states and some other features. There’s a very notable bad site that pops up on Google searches called Epic7x, which is completely trash and should be avoided at all costs. The unit info is frequently wrong, and all of the unit advice such as builds or viability are horrendous as well. Once again, do not take advice on how to build units or whether a unit is viable from Epic7x, might as well just avoid the site entirely. -
YouTube can be outdated
The game changes every once in a while and oftentimes you might find yourself watching a video that is no longer relevant. An example of this would be recommending units for content when new and better options have been released after the video was made. This is pretty hard to avoid since you can’t really tell what’s up-to-date or not as a new player. The best you can really do is to look for more up-to-date videos or ask around and see if the information in the video is correct. -
Tier lists don’t work
There aren’t really any tier lists for this game overall due to how much different content there is. A unit could be insane in one specific PvE content and absolutely useless everywhere else. You can check the guides for specific PvE content and see what units are good there, but trying to make a comprehensive guide for PvE is borderline impossible. I will however, mention units that are recommended for new players during this guide. These units are usually usable in a wide variety of PvE content with potential to flex into PvP. PvP tier lists exist and are often made by Twitch streamers, but they are only relevant for the meta in which the list was made. The PvP meta is constantly changing, so out-of-date tier lists are effectively useless.
This isn’t really a tier list, but you can find the general PvE build order here.

Currency Guide
There is a Currency Guide that goes over how to acquire the various types of currency in the game as well as where they are used. Don’t feel pressured to memorize all of the currencies just yet, but you should use the guide to help you as you unlock more content. The most important currencies for new players are Gold, Skystones, and Covenant bookmarks.
Heroes
Keep at least one copy of every 3* rarity or higher unit. All units have the potential to be buffed so even if they are bad now they might be good in the future.
All heroes can be promoted to increase their level cap up to level 60. There is a Hero Promotion Guide which shows you how to promote heroes.

Duplicate heroes should be used to imprint your heroes. Imprinting a hero will allow them to give bonus stats to either their allies or to themselves and provide blooms which helps with promoting units. Fire, Ice, and Earth (RGB) units can also be used to imprint their Light and Dark, aka Moonlight (ML), forms or any alternate forms. You’ll want to consider any existing or potential future ML forms before committing to 5 star imprints.
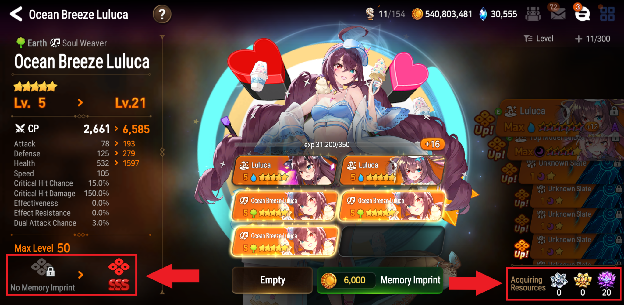
Each time you SSS imprint a unit, you’ll also make progress towards a reputation quest which gives you Cov bms. Typically it’s recommended to keep 1 SSS copy of all 3s, then SSS a second copy which you can transmit (sell) for Silver Transmit Stones (STS). Once you’ve completed the quest, you can start selling any 3 or 4s that you already have SSS copies of. Make sure to account for any ML forms as well.

Artifacts
In general you should keep every 5* artifact you get since there’s potential for them to get buffed. You can refer to the 3-4* Artifact Selling Guide to see how many of each 3-4* artifact you should keep and what you can sell. Selling artifacts will give you Powder of Knowledge (powder) which is a currency that allows you to buy Bottle of Knowledge and 5* artifacts on rotation.
Experience (Exp)
There are a bunch of different kinds of experience but I’ll go over how to get pretty much all of them. If anything is confusing, you should come back after you’ve read further in the guide or progressed further in the game since it should all make sense after you finish some of the game’s tutorials.
Account Rank Exp

This isn’t anything you should actively think about, you’ll quickly acquire account rank exp just by using energy and playing the game. It doesn’t take much exp to reach rank 60, but after that it will start taking much longer to gain account ranks. This isn’t a big deal since there aren’t any unlocks after rank 60 aside from slightly increased energy cap. The current cap is rank 70.
Unit Exp:
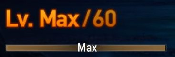
Unit exp is primarily gained by using penguins these days. Using units that are already max level will cause the majority of the exp they would have gained to progress a bar which provides Stigma when filled. Stigma is gained at a rate of 1 Stigma every 45 exp. This is nice since it lets you choose if you want to summon Blooms for promotion or summon penguins for Exp/Gold. An important thing to note is that this only happens for Adventure and Side Story stages. This also allows you to farm Friendship on max level units, which is explained below. Epic Penguins should always be sold since they provide STS as well. Newbie Penguins and Experienced Penguins are fine to use as exp, though they can also be sold for gold if needed. When farming Spirit Altar for runes, you can opt to level 2 star fodder if you can clear the stage using less than 4 units and value the exp more than friendship.
Friendship:
Friendship is gained by clearing stages using units. When you reach Friendship 10 on a unit, you will get 3 skill points. These are unit-specific substitutes for Molagora and can save you resources when building a unit. 1 Skill Point is equal to 1 Molagora, so you’d be able to save 3 Molagoras. These skill points cannot be exchanged for Molagoras, so you have to use them on the unit. If the unit is already +15 maxed skills, then you would get molagora instead. Friendship can also be increased using Gifts. Gifts give 30 Friendship when used on a hero that matches the gift’s element and 10 Friendship otherwise. You can also unlock different expressions for your units as their friendship increases.
Gear Exp
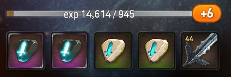
Gear exp is typically charms or dust that you can acquire by selling gear. Gear level 51 and below should be sold for exp. These low level gears are acquired by just clearing stages in Adventure. Charms are primarily acquired from clearing stages in Episode or from the Conquest Point shop.
Artifact Exp
Artifact exp typically comes from charms or 1-2* artifacts. The low level artifacts are acquired from Friendship Summons. Note that these should not be purchased in Garo’s shop. It just so happens that when using friendship summons to get 2* units, you get a lot of 1* and 2* artifacts, at which point it’s more valuable to use them as exp than to sell them. Charms are primarily acquired from Guilds and Azmakalis of Cycle(check the respective sections for details).
Web Events

The Events section can be accessed on the left side of the Lobby. There’s all sorts of events here, too many to describe, so make sure to check this tab frequently for all sorts of rewards.

Additionally, for anyone playing on mobile or emulator, you can click on this icon at the bottom of the menu top right. This allows you to enter coupon codes or watch ads for energy.
Early Game - Road to Farming Gear
The early game will be focused on getting through the bare minimum of story and working towards clearing Wyvern. Wyvern is the primary place you will be farming gear to put on your units. We focus Wyvern over the other hunts because Speed Set is the most universally usable set. This makes it the best to farm early game since it’ll let you build a lot of units despite only farming one location. Wyvern is also very easy to clear with free units and free gear. There are a bunch of things you can do while working towards Wyvern however, all of which I’ll explain in order of unlock.
Episode
Make sure to 3 star every stage along the way so you don’t need to run it twice. Early on the only requirement that matters is “Have 3/2 or more Heroes survive.” If you keep 3 units up to par with levels, this shouldn’t be that hard. You’ll want to clear every single stage with 3 stars as it gives you covenant bookmarks, skystones(ss), and Molagora.
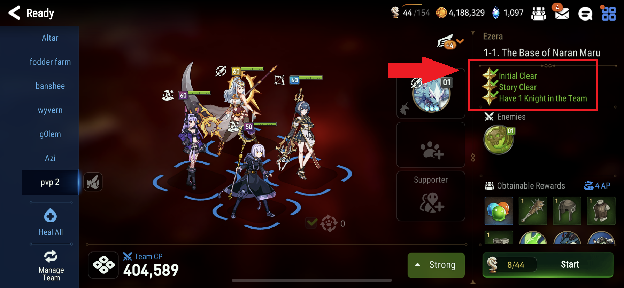
Continue pushing Episode until you clear Episode 2 Chapter 4. The stages should be able to be cleared pretty easily using some of the free units provided and the f. Some of the bosses might potentially give you trouble, in which case you should ideally abuse strong friend supporters to clear any bosses.
You can ask for people to help carry you in the #friend-finder channel in the Discord or if you know people who play the game you can ask them as well. Another method is to first customize your profile a bit: set a name, change your status (can put something mentioning you’re looking for supporters for Story), set a Rep Hero, set your Supporters, and maybe make a fun profile card. Next, go to the Friends tab via the menu top right, type in any two letters, tap Search, and start sending friend requests to level 70 accounts until you hit the cap. If this isn’t an option, then go back to clear any stages you haven’t gotten 3 stars for yet and once that is done you can just farm the highest stage you can clear for EXP.
While pushing through Episode, you’ll unlock various new content along the way which will be explained in their respective sections below.
New Player Check-In
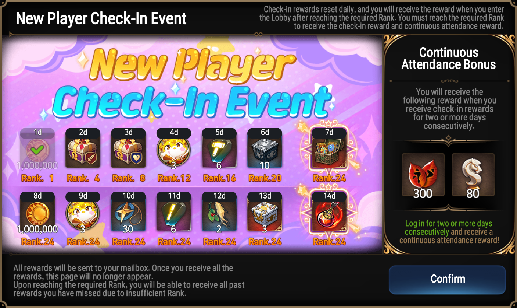
You’ll get this popup when you first open the game. The Rank requirements don’t need to be stressed about, you’ll get them naturally just from playing the game. The gear from day 2 and 3 isn’t needed to progress anymore, so don’t worry about that either. You’ll get much better gear from the Milestone of Radiance and Path of Heir.
Epic Pass
Epic Dash is an one of the Event tabs where find various kinds of battle passes. You can progress the passes by clearing the missions shown in the “Mission Details” tab. Each pass has free rewards and premium rewards. For new players, you’ll immediately see 3 passes: An Heir’s First Steps, Hero Growth Boost, and Episode Conquest. The premium rewards for these passes can only be acquired using actual money, but the value is very good and it lasts forever (for now) so there’s no rush to buy it. Every once in a while, we’ll also get passes for Hero skins and passes with a bunch of gear focused items. These two passes have their premium rewards locked behind skystones instead, so the skins notably can be acquired pretty much for free. For now let’s go over the new player passes and their value.
Heir’s Memory
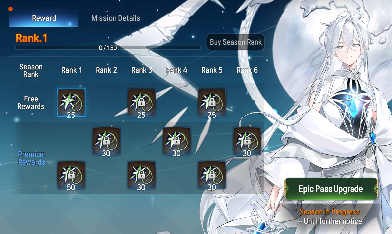
This pass provides Chronicle Bookmarks which can only be used on the standard Covenant Summon (more details on banner types in the Summon section below). The Free Rewards provide 50 summons and the Premium Rewards add 67 summons. The upgrades costs 1,900 skystones, which is pretty good value but since the summons can only be used on the standard Covenant Banner, I’d save this for later on.
An Heir’s First Steps
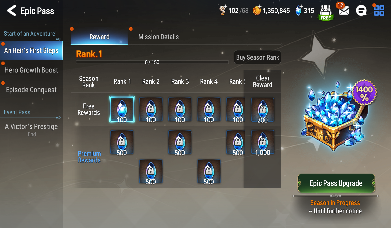
The free rewards add up to 1,000 skystones. The Premium Rewards are really good value, it’s 5,000 skystones for $10. This is roughly 71 Covenant rolls and 18.5 Mystic rolls. One of the best value packs in the game and definitely worth grabbing for anyone looking to spend a little bit.
Hero Growth Boost
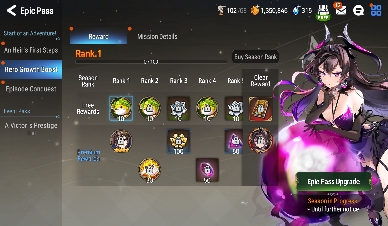
The free rewards give some penguins and blooms with a 5 star random Hero ticket at the end. The Premium Rewards cost $30 and gets you Specter Tenebria (yes the unit), her skin (shown in the image), enough resources to completely max her out, and a bunch of extra runes, blooms, and penguins. She’s pretty useless these days, but if you like her, $30 for her and the skin is a steal. The skin is usually sold for $50 and the 30 molagoras as well are typically priced much more expensively. So even without factoring in the unit, it’s already pretty good value as long as you want the skin.
Episode Conquest
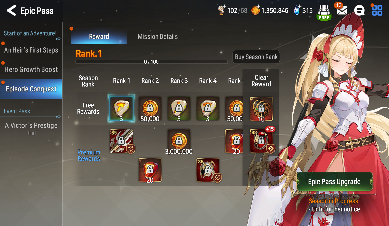
The Free Rewards provide some charms and gold with random gear chests at the end. The Premium Rewards costs $30. There's 4 Speed set pieces and 2 Hit set pieces +15 all with 17 speed (except the boots). There's also 2 Crit set and 4 Speed set +0 pieces with DPS substats as well as a bunch of charms and gold. The value of the pack varies by person honestly. 17 speed is really nice to have early and mid game. Once you hit the end end-game, 17 speed is a bit slow for your fastest unit and the overall low rolls on the pieces make them not great for semi-fast units as well. It’ll take a while for your speed to reach this point though, so this could be a good investment while you’re building up your gear. The +0 gear all looks solid, every piece is worth rolling.
Rank Achievement Event
Rank Achievement Event is only available for New and Returning players. This just hands out Covenant Bookmarks, Iseria, and Song of Stars as your rank increases. Iseria is a great PvE unit especially early game and Song of Stars is always nice to have as well.
Summon
Summon is unlocked after clearing [6th World Episode, Chapter 2] “The Encounter with the Covenant”.
Milestone of Radiance
Milestone of Radiance is unlocked after clearing [6th World Episode, Chapter 2] “The Encounter with the Covenant”.
The first chest you open will always upgrade to a gold chest and give you the selection between Charles, Tenebria, and Kise. The best unit to pick of these three is Charles, he’s borderline mandatory for a piece of PvE content later and the other two units are not used.
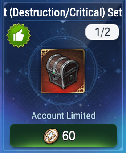
In the exchange, the first thing you should buy is the gear sets, starting with the Destruction/Critical set. You can put this on Free Spirit Tieria after you unlock her. The Speed/Health set will be good for Ruele.
Orbis Guide (Path of Heir)
Orbis Guide is unlocked after clearing [6th World Episode, Chapter 2] “The Encounter with the Covenant”. This is where you can find your Daily and Weekly missions, as well as the Path of Heir for any new players. Path of Heir serves as an in-game progression guide and pretty much dumps rewards on you while you play the game for the first few months. You should try to complete the missions whenever you can for the rewards.
Spirit Altar

Spirit Altar is unlocked after clearing [6th World Episode, Chapter 3] “Things to Keep”. Runes are used to awaken your units and to further enhance SC units. The best place to farm Common Runes is Easy difficulty. Greater Runes and Epic Runes should be farmed in Hell difficulty (or as high as you can go).
Ideally you’ll want to farm for runes during 2x Rune Buff events (this happens around once a month), but if you need runes to progress your account to Wyvern or to do something else you want to do, it’s fine to farm runes outside of buff events. The altars rotation on the schedule shown below, with all altars additionally being open during 2x Rune Buff events regardless of the day. For the first month of the game or if you’re a returning player, all altars will be open for 30 days. There’s also an option to unlock a closed altar with skystones, but this is absolutely not worth it at all, just wait for the altar to unlock naturally.
| Mon | Tues | Wed | Thurs | Fri | Sat | Sun |
|---|---|---|---|---|---|---|
| Dark | Fire | Ice | Earth | Light | All | All |
Connections
Connections are unlocked after clearing [6th World Episode, Chapter 3] “The One Who Refuses to Give Up”. This is where you can acquire units for free by completing certain missions. Each unit in the Connections also has a requirement you have to meet before you can start working on their missions.
I’m only gonna mention the connections that actually matter.

Free Spirit Tieria (FST): Unlocked after clearing [6th World Episode, Chapter 3] “The One Who Refuses to Give Up”. She’s only worth building if you decided not to pick Arbiter Vildred from your Moonlight Blessing. He’s pretty much just a complete upgrade to her, so I’d jump ahead to the Moonlight Blessing section and figure out who you want to pick first. If you didn’t pick Arby, then she’ll be one of your main DPS for early Episode and any content where the mobs are easily killable.

Lorina: Unlocked after clearing Episode 1 Chapter 5. She has a SC which turns her into Commander Lorina and she becomes a great DPS for Labyrinth, Abyss and Fire Expedition. It’s worth getting her SC at least started early since one of the missions takes a very long time to complete.

Furious: Unlocked after clearing [Episode 2, Chapter 3] “Flight”. Furious is an irreplaceable part of your early Wyvern team. He is the primary debuffer and a mandatory pick-up unless you hate men.

Tamarinne: Unlocked after clearing [Episode 2, Chapter 8] “Human Nature”, though you should clear [Episode 2, Chapter 10] to get the free Milestone in Time from Path of Heir. Also her missions require a Guild Aid, so you definitely want to make sure you’re in an active Guild. Tamarinne is by far and away the best PvE healer with Healing, Atk buff, CR push, and a bit of cleanse. Fantastic healer for Episode, Hunt, Labyrinth, Abyss, Fire Expedition, Earth Expedition, Ice Expedition, Dark Expedition, and Trial of the Constellation Herais.

Camilla: Unlocked after clearing [Episode 3, Chapter 9] “Unending”. More of a mid-game unit but definitely a unit worth picking up. She’s a great Def Breaker + Atk buffer + Dual Attack support for Abyss, Fire Expedition, Dark Expedition, and Light Expedition.

Veronica: Unlocked after clearing [Episode 5, Chapter 3] “Survivors”. Speed imprint for PvP, with a passive that heavily punishes units with Immortality.
Moonlight Blessing
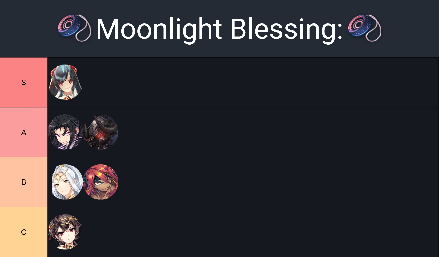
Moonlight Blessing is unlocked after clearing [6th World Episode, Chapter 3] “The One Who Refuses to Give Up”. This gives you a free ML 5* with a choice between 6 units. Currently the best choice Ruele of Light. She’s a reviver with great burst healing and invincibility. She also has good tank base stats plus a passive buff that lets her revive and push 50% CR once per battle. Very strong for all PvP content, but not useful for PvE. If you already have Ruele, then the other options aren’t nearly as good. Arby’s an AOE DPS who replaces Free Spirit Tieria with niche PvP usage and Dark Corvus is a PvP tank with insane damage on his S3, though it has a very long cooldown (Warfare Set is great with him).
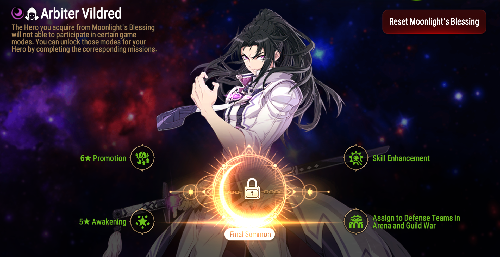
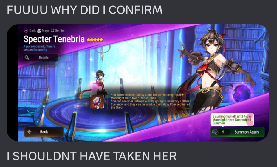
After you complete all 4 missions, there will be a final button to press before you fully summon the unit. It’s recommended to not do this until you absolutely need to so that you can swap to a different ML5 if you happen to roll whoever you pick. For the same reason, don’t select a different ML5 and swap to what you want later because you only get 1 swap. None of the missions really need to be rushed as you’ll do these things naturally.
Don’t be like this guy.
Abyss
Abyss is unlocked after clearing [6th World Episode, Chapter 3] “Failed to Protect”. You shouldn't think too hard about this in the early game. Just put your 4 best units into a team and send them in. If you want, you can consider saving the floors that drop Gold for a Gold buff day for bonus Gold.
There is an Abyss Guide with team comps for all the floors.
Challenge Mode is unlocked after you clear Abyss Floor 80. Similar to Adventure, each stage has 3 requirements that need to be fulfilled. There are rewards for each stage based on how many stars you’ve obtained for that stage as well as rewards based on how many stars you’ve obtained total. Floors that have already been cleared can be replayed for free, so you can clear a floor with a standard team first then go back to get the full rewards later if you want.
Guild
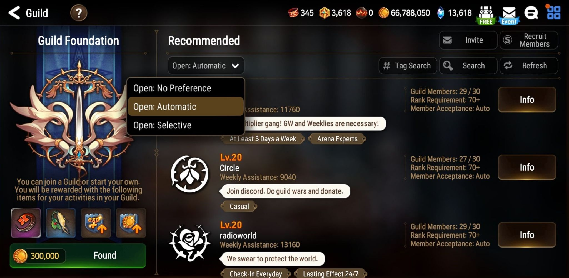
Guilds are unlocked at Rank 10. You should look to find a guild as soon as possible due to the large amount of rewards available and because you’ll need Brave Crests for Furious’s connection. This can be done by asking around in the #guild-recruitment-hall channel in the Discord, or searching in-game for guilds with Automatic acceptance enabled (make sure the guild isn’t a dead guild by checking the recent login dates of the members). Your guild currency will not be lost if you change guilds, though there is a 24h cooldown before you can join a new guild.
The Member Shop in the guild has a lot of things worth buying. There is a Molagora, Equipment Gem Conversion boxes, Artifacts Charms, and some very strong Artifacts as well. This is one of your primary sources of artifact exp. You can check the currency guide for more info on acquiring and using the 3 guild currencies: Brave Crests, Proof of Courage, and Commander’s Armbands.
Each day you should be donating the maximum amount of Gold and Proof of Courage you can, donating whatever you can for Aid, doing World Boss when it’s available, and doing Guild War when it’s available.
For Aid, your entire guild should be donating Lesser Spirit Blooms.This is because it maximizes the amount of Brave Crests that can be earned. Each member generates 120 crests as opposed to Greater Runes which only generates 100 crests and is less energy efficient to farm. Donating catalysts is also generally not a good idea, since they only generate 80 crests. If you're worried about running low on the resource, then only donate the amount you receive so you go even.
Guild War occurs on Monday, Wednesday, and Friday. Even if you don’t have a good unit and are going to lose every fight, you should still use your attacks since you’ll get some Mystics and Armbands.
World boss is every day except Thursday. It costs 20 energy per attack for up to 2 attacks. You can get a variety of rewards from the boxes after each attack. You’ll also get a random Equipment Conversion Gem as well as a Equipment Gem Conversion Chests (where you can select the Gem) if you score high enough. The boss will reset after 3 days and you’ll get some armbands as well based on how many people used your team.
Ancient Inheritance (AI) is unlocked at rank 40. It is a collaborative guild content that is playable for 2 weeks every 3 months. All units used in AI will be boosted to level 60, 6 star awakening and +15 skill enhancement. Gear stats are heavily reduced, making AI accessible to players of any level. The rewards from AI are great and it costs nothing to play so you should participate whenever it comes around.
There is an Ancient Inheritance Guide with some general tips, team compositions, enemy skills, and a link to a live-updating map.
Orge’s Armory
Ogre’s Armory is unlocked after clearing 6th World Episode 4 “What Must Be Protected”. This is garbage. Do the bare minimum needed to clear the Path of Heir missions.
Genesis Ras
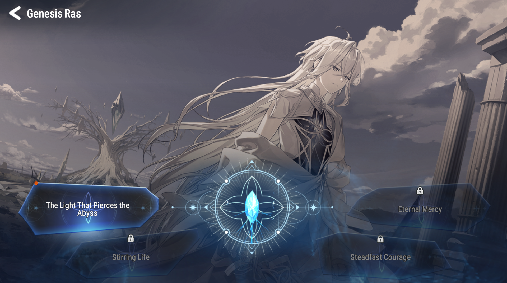 After finishing “6th World Episode A Resolve Inherited” you will unlock a set of quests which give you Genesis Ras and his imprints. The quests can be accessed from your lobby and there are 4 segments. This is a long-term set of missions for you to progress through, so no need to rush them and use leifs. Just think of it as something to progress alongside your daily farming and progression. We will go over each segment and how you can finish them optimally. Genesis Ras is great for both PvE and PvP, so he’s a very valuable unit to pick up especially since he’s more or less free.
1.The Light That Pierces the Abyss:
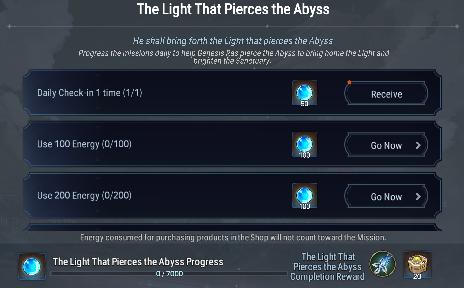
This part is simply doing these very easily achievable dailies. Doing all of them gives you 1000 of this currency  . You do them for 7 days and you fill up the bar at the bottom to progress to the next stage.
2. Stirring Life:
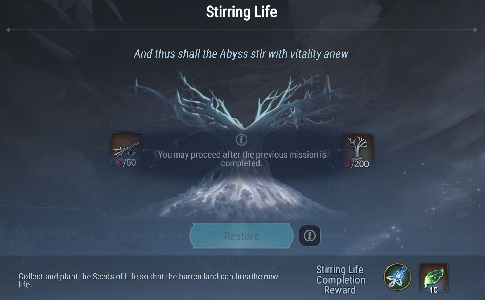
There are two currencies that you have to get in this stage. 50 Fragment of the Holy Slates  and 200 Sapling of the Young Sacred Tree
  . You can get Fragment of the Holy Slate as you farm for AP in Episode stages or farm your Side Story . You get Sapling of the Young Sacred Tree by doing Hunts, Otherworldly Hunts, Otherworldly Breach, Rift or Spirit Altar. Though you should just do Otherworldly Hunts, Rift or Hell difficulty hunts as a new player. Again just slowly stock up on both of these currencies via your day to day farming. Note that any gear you get which is upgraded to +9 or above and rolled badly you don’t discard. We will need them for the next stage. Once you get enough of both currencies you can progress onto the next stage.
3. Steadfast Courage:
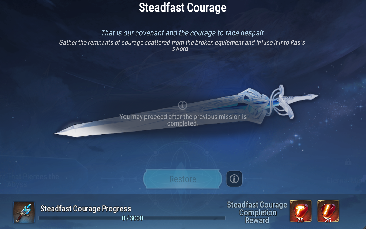
In this stage you will dismantle any +9 gear that you have no use for to fill up the bar below. Dismantling means you get no gold or dust in return. If you saved up your redundant gear from the farming in the second stage then you should progress through this quite quickly. If you did not save any gear then do not waste charms or dust enhancing random gear to +9. Farm more gear and roll gear like you normally would. And then dismantle any piece of gear that rolled badly. It will take more time but there is no need to rush the quest anyways so you’d rather save your charms and dust. Filling the bar below allows you to progress to the next stage.
4. Eternal Mercy:
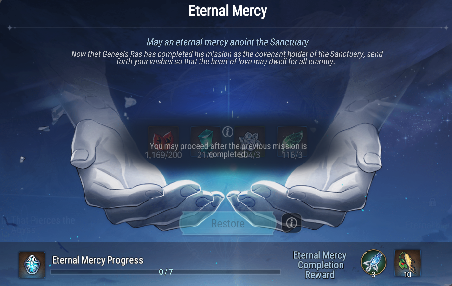
In this stage you simply hand over stigma  , Silver Transmit Stones
  , Lesser Spirit Blooms
  and Leifs
  . You can get stigma by farming Episode stages. Silver Transmit Stones can be obtained by transmitting heroes or really from just a bunch of random sources. You should not be lacking them. But in case you are, just transmit 3-star heroes which you already have a max imprinted copy of (you should keep a max imprinted copy of every 3 star or 4 star hero to progress the reputation quest which gives Covenant bookmarks). Blooms you can get from Sanctuary > Forest of Souls in exchange for stigma. Leifs are handed out from events, sidestory reputation quests, automaton tower, etc. or given in your mailbox often as rewards. New players also have a lot of them from just their rewards in general. If you are missing leifs though just go through the events tab and see if you can get some. Or go through Path of Heir, do automaton tower if you haven’t already, check your mail, see if there are any active coupons in the official discord server, do your sidestory etc. After finishing this you will finally have Genesis Ras and the imprint materials for him to be SSS imprint.
Arena
 Arena is unlocked after clearing [6th World Episode, Chapter 4] “ The Final Fight”. It’s important to do this early because you get double Conquest Points during your first month. Conquest points are used to buy charms to enhance your gear.
You should target teams that are weaker than your offense team. You can try to estimate this by checking the level and awakens of the units on their defense as well as checking their rank. Early on, a lot of the defenses are just one unit or low awakens. Eventually you’ll need to start hitting full teams, and that's when you’ll have to start learning more about what units do and how your units work. You can click the lightning icon near the bottom right to use Quick Battles, which just play the fight out very quickly on auto. Only use this if you’re sure you’ll win the fight.
You lose no points in Bronze for losing a defense, increasing by 2 each time you increase a full rank (Silver, Gold, etc.), So you don’t need to worry super hard about defense until you reach higher ranks. You should also make use of the Revenge function, which lets you attack the defense of someone who hit you which you can see in the Battle Log.
Just your PvE units should be able to get you to Challenger. Arbiter Vildred, Mercedes, Brieg, and Ras was the main team I used. I just targeted anything that didn’t look too tanky and it was fine. It becomes a lot harder to get wins in Challenger, so you should look to do NPC Challenges whenever you get stuck.
Sanctuary

Sanctuary is unlocked after clearing [Episode 1, Chapter 1] “World of Chaos”. There’s 3 important features here: Forest of Souls, Heart of Orbis, and Alchemist’s Steeple.
Forest of Souls is unlocked immediately and is where you can convert Stigma into Penguins and Blooms. Stigma you can get mainly from clearing stages in Episode or Side Story.
Heart of Orbis is unlocked after clearing [Episode 1, Chapter 4] “Love, Remembrance, Eternity”. You’ll get 400 Tainted Relics at the start of the month and 200 Tainted Relics at the start of the week which can be used to roll for a random reward (high level Guilds can get more Tainted Relics). Rewards can only be claimed once a month, but up to 5 rewards can be stored for you to choose from later. The most important common reward you’ll see is 50 Leifs. The only things better than that are the Bottle of Knowledge, +9 gear, and +15 gear which are very unlikely to obtain.
Alchemist’s Steeple is unlocked after clearing [Episode 1, Chapter 5] “A Wish to Protect the World”. This is where you can convert Equipment Cores into Charms, and Modification Cores into Substat Modification Gems. Equipment Cores can be obtained by extracted unwanted gear, while Modification Cores can be obtained by extracting unwanted Substat Mod Gems.
Labyrinth

Labyrinth is unlocked after clearing [Episode 1, Chapter 1] “Belief at a Crossroads]. At the start, only Tirel Castle will be available. Great Farche Labyrinth unlocks after you clear (need to check). Nixied’s Sanctum unlocks after you clear [Episode 2, Chapter 3] “Flight”. Malicus's Consciousness unlocks after you clear [Episode 2, Chapter 7] “Lingering Hope”. Royal Capital Azmakalis unlocks when you reach Rank 60.
You can find Vagrant Merchant Huche inside as well, who sells charms, Cov bms, and catalysts (you can ignore the rest). He is in a specific spot per stage and does not move. The easiest place to find him is here in Tirel Castle Area 1 or here in Tirel Castle Area 4. You should check this location every day since his stock refreshes and purchase what you can. After you purchase the items, make sure to Yield instead of exiting via a portal.


There’s no entry fee for Labyrinths now so you should just look to push Labyrinths whenever you have the time. In order to unlock the next Area in each Labyrinth, you will need to complete the previous Area first. Make sure you exit through the portal that has the next Zone above it on the map. You can click on any orange tiles you’ve previously been on to teleport there as well.
The main rewards are the level 88 gear and the 5 star Artifact ticket in Malicus’s Consciousness and the 5 star Artifact ticket in Nixied’s Sanctum Area 5. The rest of the gear is pretty useless, though you’ll want to eventually grab all of the other rewards in the Gold Chests and exploration bar. Getting 100% exploration also gives 100 Skystones from Reputations.
Specialty Change
Specialty Change (SC) is unlocked after clearing [Episode 1, Chapter 6] “For Hope”. Specialty Changes are used to power up your 3 stars, giving them more stats, enhanced skills, and other effects.
There is a Specialty Change Guide that goes over some general info about SCs, the general viability of each SC and how to clear the missions.
Side Story
Side Story is unlocked after clearing [Episode 1, Chapter 6] “For Hope”. I’ll be splitting these sections into their own parts in this guide, starting with the section that’s named Side Story. There are a few kinds of side stories.
A standard side story is explained via the side story “A Dear Mentor.” Everything in a standard side story shop except for the runes and the gold is worth farming for. The stage with 4 difficulties from Easy to Hell is the stage that you farm for event currency. You should always farm the highest difficulty that you can clear since it will provide the most currency per energy spent.
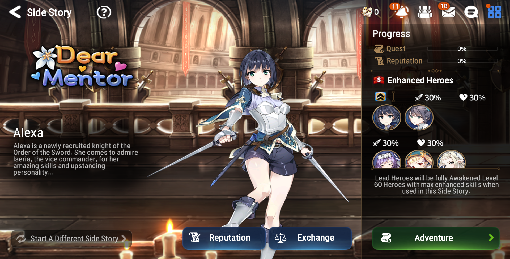
Upon clearing “A Dear Mentor,” you’ll receive the “Story Collection” material. This material is used for Story Summon. Story Summon can be found in the Summon section where you see all of the usual banners. This is where you can activate temporary banners for units whose side stories you have started. It costs 4 Story Collections to start a Story Summon, but the very first Story Summon unlock is free (the unlock is free, you do not get the unit for free). The Story Summon banner functions like any other banner and lasts for 7 days. 120 rolls to hit pity, 1% chance for rate up Hero, 1% chance for rate up Artifact, and the artifact is available in the Powder of Knowledge shop. Make sure you have the bookmarks to pity the unit you want before starting the banner since it only lasts 7 days. After the banner ends, you’ll have the ability to use 4 Story Collections to open the character banner again if you want to for whatever reason. Tamarinne and Brieg are both free units now, so you don’t want to put them as Story Summon targets. The biggest priority for Story Summon will be Fenne, though there’s a good chance you hit her on a 5 star ticket. Beyond that, I’d say that Story Summons are kind of not that useful because unless you really need the unit, you’re often better off saving your bookmarks.
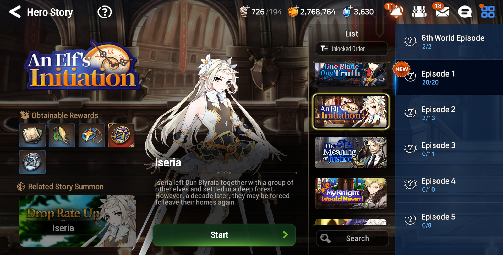
You can also start choosing other side stories in the Side Story List at the bottom left. These are character focused side stories that will be unlocked as you progress through Adventure. Once you select another side story, you will not be able to return to any previously cleared side stories, so make sure that you have purchased everything you need from the shop. Any side stories selected from the Side Story List will remain indefinitely, so there is no rush to clear them. Every 2 weeks you can switch your side story to another one and clear that instead. You’ll want to make sure that you unlock any units you want, but you can also utilize the Side Story List to selectively farm catalysts that you want. Buying the catalysts from the side story shop is much more efficient than farming catalysts normally. Any newly released side stories will be added to the Side Story List immediately, but they cannot be put in Story Summon for 24 weeks after their initial banner concludes.
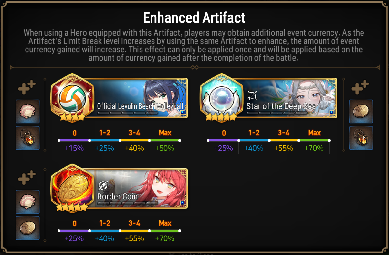
A special side story is a multi-week side story tied to a holiday or a collaboration event with each week unlocking a new section. Special side stories also have certain artifacts that give bonus currency when you use them on your team. These artifacts are typically acquired via the event itself or from the banner of a unit associated with the event and can be checked via the special side story’s homepage. The shops for special side stories typically come with artifacts and/or gear as well. If the artifact is a bonus event currency artifact, it should instantly be bought out to reduce the energy needed to clear the shop (unless it’s a rerun and you already have one maxed). The gear is usually good but you should double check if you’re unsure (make sure it’s at least level 78).
Finally, there are puzzle sidestories. Rather than using an exchange shop, puzzle sidestories have 24 puzzle pieces that can be unlocked by completing missions. These missions are really easy and you can reroll each piece’s mission 10 times for free so it’s pretty much just free stuff for little effort.
Grace of Growth
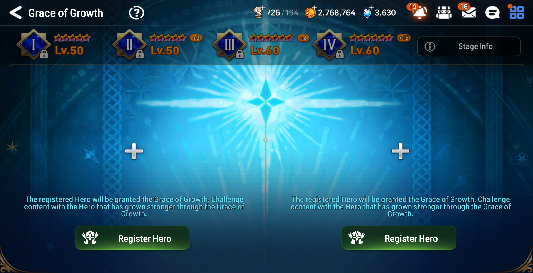
Grace of Growth is unlocked after clearing [Episode 1, Chapter 6] “For Hope”. This system lets you register two heroes to receive a temporary boost to their level, awakenings, and skill enhances. In order to get the maximum boost, you’ll need to get 3 heroes to level 60 and max out a 5 star rarity hero’s skills. The boost lasts until you unregister the hero. Unregistering a hero will make you unable to register another hero for 24 hours. The waiting time can be skipped costing 5 skystones per 30 minutes remaining (this isn’t worth it). You also won’t be able to use the registered hero on Arena Def, GW Def, World Boss, or your profile supporter slots.
This is very useful for content where you use units you won’t be permanently using such as Abyss, Trial of the Constellations, Hall of Trials, and Advent. Some Abyss stages can be easily cleared by units that you’ll literally never use ever again, so Grace would let you clear the floor at no cost instead of having to build a unit just for one floor. Trial of the Constellations has you using some units that are only used on that specific boss, so you could consider swapping in the unit, clearing the boss, then removing them. After the cooldown ends, repeat the process for whatever units you need and this could save you a lot of resources though it’s also a lot of management. Hall of Trials is mostly for end-game but going for top 100 in the rankings will frequently require one-off units and Grace is amazing for skipping investment into those units. Advent is a very infrequent piece of content, but it does sometimes ask you to use one-off units as well.
You could also use this to test out units in Arena, GW and RTA. If you don’t want to commit the investment just yet.
Shadow Company
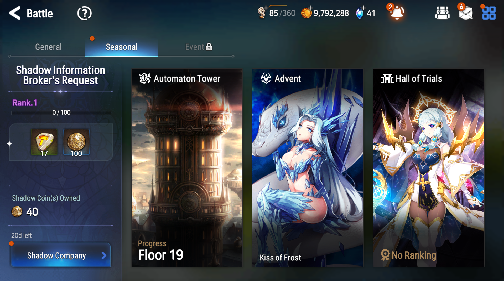
Shadow Company is unlocked after clearing [Episode 2, Chapter 1] “Meeting the Covenant”. This contains rotating PvE content and a bunch of rewards for clearing missions. At any time 3 or 4 of the content mentioned are available and they are rotated every 3 weeks. Some frequently rotating content examples are Automaton Tower, Hall of Trials, Expedition, and Trial of the Constellations. There’s also less frequent content like Advent, or Brawl, and the occasional one-time content as well. By clicking on the “Shadow Company” button on the bottom left corner of your screen you get to this page.
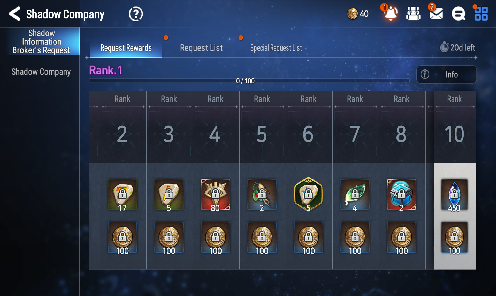
This is a battlepass just like how Epic Pass is. The battlepass alongside the currency and the shop on the second tab of this page all refresh every 3 weeks. It is recommended to finish the battle pass because the rewards are very good.
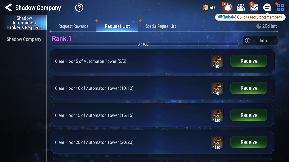
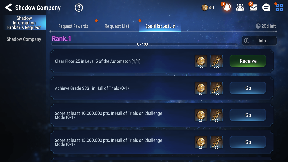
The quests in “Request List” and “Special Request List” involve the content available for the 3 weeks. The quests in “Request List” are relatively shorter but only give Shadow Token  while the quests in “Special Request List” are relatively longer but also give Shadow coin
  . 3 weeks is more than enough time though to finish all of the quests as long as you do all the various content. Shadow Token is used to progress your battlepass as you claim them from the quests. Shadow Coins can be used in the shop which is accessible from the second tab on the left side of the screen.
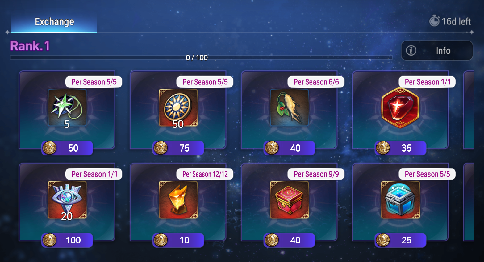
Finishing the quests and the battlepass doesn’t give you enough coins to clear the entire shop, so you’ll need to skip some items. It’s personal preference what you want to skip, usually people skip the reforge material boxes, catalysts or level 88 boxes. Apart from that you should buy everything else.
Automaton Tower
Automaton Tower is unlocked after clearing [Episode 2, Chapter 1] “Meeting the Covenant”. It gives a variety of rewards well worth the energy spent. After each floor, you are presented with 3 devices to choose from that buff your units. In general you should look for devices that buff your units in the long run rather than upfront effects and devices that benefit your overall unit pool. You should try to clear the highest level you can every reset, but if you absolutely can’t pass a certain stage, you can reset the tower and go to a lower level. You won’t need to spend energy to clear floors you’ve already cleared and you won’t get rewards for said floors either (this doesn't apply to the biweekly reset which is a complete reset). You shouldn’t bother building units specifically for this, just use whatever your strongest units are and if you have the unit pool, shift them around depending on what devices you get.
One important note, you can jump straight to the 4th level if you clear Abyss 100, and some of the earlier levels can be unlocked as well depending on Abyss progress. So in the early game I’d recommend seeing if you can clear the Abyss floor required before you start doing Automaton Tower.
Secret Shop
Secret Shop is unlocked after clearing Episode 2 Chapter 1. This is where most of your skystones should be going as it’s the best value for getting Covenant bookmarks, and the primary source of Mystic Medals. Buying Cov BMs directly with skystones is 95 skystones per roll, while refreshing the Secret Shop averages out to 70 skystones per roll. This is a pretty big discount on skystones, just keep in mind it’ll cost gold to purchase the BMs.
For Mystic Medals, the only other consistent source is Guild War so if you don’t refresh Secret Shop your mystic medal income is going to be incredibly slow. On average it’ll cost 270 skystones per roll for Mystics. I’ll mention again, the Mystics from Arena are not worth it since you’ll get more Mystics from using the skystones in the Secret Shop instead.
Pets
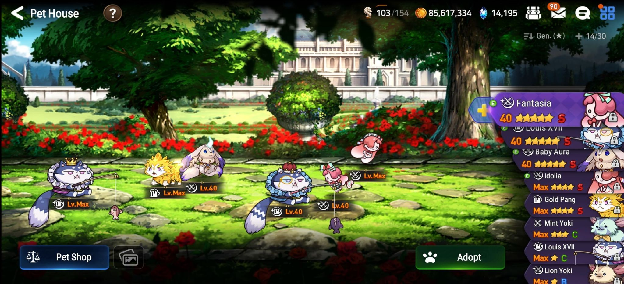
Pets and the Pet House are unlocked at Rank 20. They allow you to automatically repeat battles and do any repeated battles in the background. They also provide various bonuses depending on their skills and automatically interact with objects in Adventure/Side Story. This is costly to invest in early due to Pet Tickets costing gold (do not buy tickets with skystones), but you should at least do your daily summons and use any tickets you get from World Boss. You’ll want to slowly work towards building a Hunt pet as your first pet. When farming Adventure or Spirit Altar, just use any pet with a corresponding skill.
There is a Pet Guide that goes over just about everything regarding pets.
A Journey to Succession (Challenge: Hunt)
A Journey to Succession is unlocked after clearing Episode 2 Chapter 3. There’s 4 tabs here: Hunt, Azmakalis, Rift, and Hall of Trials. We’ll be focusing on Hunt for now and the rest we can deal with later.
You’ll want to first select the Wyvern Challenge. If you want to start a different one, you can click the back button and it’ll save your progress so no need to worry about that. The missions provide us with all of the units and gear we’ll need to clear Wyvern, but before we do that there’s one more thing to unlock.
Hall of Trials
Hall of Trials (HoT) is unlocked after clearing Episode 2 Chapter 4. It gives you access to unit-specific Exclusive Equipment (EE) that can upgrade certain unit’s skills and give them a bit of stats. There’s 2 types of currencies here: Wisdom’s Gaze and Fate’s Gaze. Fate’s Gazes are used to purchase EEs for exclusively ML5s, while Wisdom’s Gaze is used for all the other units. There’s also 2 difficulties: Normal Mode and Challenge Mode. Challenge Mode gives the better rewards as the score has no cap, while Normal Mode is capped at 4 million. It’s also harder though as the name implies, so you can do Normal Mode if you’re struggling to clear.
For normal EEs, there’s 3 different effects per unit. It’s completely RNG which effect you as well as the value of the stat, but in the worst case scenario you can exchange 6 EEs in the Steel Workshop to select the effect of the EE and guarantee a maxed stat. Typically you’d only do this for units that actually need the stat as some units only care about the effect.
Wisdom’s Gaze is pretty easily acquired, you just need to score SSS+ to get the max amount each week. Getting SSS+ is pretty trivial even on a new account (depends a bit on the rotation) and eventually you’ll end up with a large surplus of this currency. Though at the start you might find yourself running low as you purchase EEs for all of the different units you use.
For ML5 EEs there’s only 1 effect though the stat value is still RNG. These are much harder to get due to how slow the currency acquisition is, so you might want to consider settling for a non-maxed stat depending on the unit since there’s no way to craft these. Any excess ML5s EEs can instead be sold for 10 Fate’s Gaze each to try and roll again.
Fate’s Gaze is much harder to acquire. You can only get this depending on how high you score in the rankings for each rotation. Top 5% gets 40 Fate’s Gaze (enough for 1 roll), Top 10% gets 30, and Top 20% gets 20. It’s not nearly as bad as it sounds because you can hit top 10% on a new account within a week depending on the rotation. Once you hit mid-game hitting 5% is hardly any issue at all since it seems like barely anyone even does this gamemode. For scoring in the top 100, it becomes a lot harder as you’re competing against others in the server and there’s much less space to go around. If you’re interested in trying for the top 100, I upload the top 100 comps for each rotation on my channel. Sometimes you might also get a bonus Auto team or F2P team.
Wyvern
It’s now time for you to start working towards Wyvern - Hell. As mentioned earlier, Speed Set is the most universally usable set, making it the best to farm early game since it’ll let you build a lot of units despite only farming one location. The other two sets are useful for pushing Mid Game PvE content and can be used in PvP as well.
 Speed (Spd) set increases Spd by 25%. This set is used on all kinds of tanks, DPS and Bruisers. You’ll be relying on this set to gear most of your units as it is the most versatile.
 Critical (Crit) set increases Critical Hit Chance (CritC) by 12%. This set is used on DPS and Bruisers as the second set. It has competition from some other 2 piece sets later on, but for now this should be the main set you use since you can get it while farming Spd set gear.
 Hit set increases Effectiveness (Eff) by 20%. This set is used on tanks with debuffs and a few PvP DPS that are reliant on landing debuffs to deal damage. You can also use this on PvE debuffer/DPS to help them reach the necessary Eff.
Make sure you’ve started your Wyvern Challenge in A Journey of Succession so we can progress with the missions. If at any point you find yourself low on resources, farm in Episode or Side Story for some catalysts and stigma. You can get additional gear charms from the Conquest Point shop as well.
Our first tank is either Ruele from ML Blessing, or Angelica who should be put in Grace of Growth. We’ll stop using her soon, so it’s good to make use of Grace so we don’t waste resources. You can use the HP Gear from the Milestone Shop, or the HP set pieces we got from Path of Heir. These pieces are all good to invest in, just make sure you have charms for the gear you’ll be getting from the missions as well. Her artifact should be Prophetic Candlestick, Envoy’s Pipe, or Egg of Delusion. The only artifact of those 3 worth leveling is Candlestick, the other 2 I’d leave at +0.
Next you’ll want to unlock Furious from Connections and get him to level 50 with 3 awakens. Eventually we’ll get him to 5 awakens so we can equip his S3 Blind Exclusive Equipment, so you can get that out of the way now if you want. Besides that, we dont need to enhance her anymore, just leave him at level 50 with 5 awakens. Put the gear we get from the missions onto him, and level some of the pieces to at least +6 or +9. You’ll also want to skill enhance his S2 for the -1 turn and his S3 for the -1 turn and effect chances. If you want to save molas you can leave him +4 for now and get his last effect chance after he hits friendship 10. If you haven’t claimed Song of Stars yet, go claim it from the Rank Achievement Event and put it on Furious. For your DPS: Arbiter Vildred from ML Blessing, Fenne if you bought the pack or summoned her somehow already, Free Spirit Tieria, and Mercedes are good options. You can now attempt to clear Normal mode with Ruele/Angelica, Furious, and two of Arby/Fenne/FSTieria/Mercedes. Once you get your first clear, you’ll have unlocked Muwi and we can move onto part 2.
For part 2, we’ll be replacing Mercedes with Muwi so our team will be Ruele/Angelica, Furious, Muwi, and FSTieria/Arby/Fenne. First things first, make sure you keep 2 Daydream Jokers separate instead of fusing them all together. We’ll want 1 copy on both of our damage dealers. You can fuse all of the other copies into one DDJ, just make sure you have at least 2. Next we’ll enhance Muwi to level 50 with 3 awakens. We’ll be leaving him at level 50 forever, you can get him to 5 awakens for a tiny bit of extra damage if you want. We can put the gear we get from the missions on him, and level at least the helm and chest for some bulk so he doesn’t die as easily. You can also give him gear from the Milestone Shop and mix pieces so he has enough Eff. For his skills, I’d at least +2 all of his skills since this only costs Stigma. Getting his S1 and S3 to +4 are recommended for higher debuff chance as well.
We’ll need to clear Normal Difficulty 10 times in a row without failing on Auto-Repeat or Quick-Battling. You can kind of cheese this by doing it on Auto-Repeat and turning skills on/off to make sure Furious always has S2 up on Wyvern’s 1st turn and to summon Arky. Note that the first battle in an Auto-Repeat doesn’t count, since you haven’t started the repeat part yet. Whether you clear or fail that first fight, you’ll need to have 10 clears in a row afterwards. Make sure you have enough energy though so you don’t have your repeats ended early. Once all the missions are done, we’ll now have Sigret and we can move onto part 3.
For part 3, we’ll be moving on to Hard difficulty and we again need to clear 10 times in a row without failing on Auto-Repeat or Quick-Batting. One important note, if you have Fenne she will completely replace Sigret. So you’ll want to enhance Sigret just to the bare minimum required to complete the missions, then use Fenne instead. Even if you don’t have Fenne, Sigret should be put into Grace of Growth if anything to minimize resources spent beyond the mission requirements. Our team is going to be Ruele/Angelica, Furious, Muwi, and Fenne/Sigret. One big difference from Normal is that Wyvern will always hit front now if we have enough debuffs on it. This makes it easier for our squishy units to survive (provided we land debuffs), but puts all of the tanking burden on the front unit. The Milestone Gear should be enough to survive. If using Angelica, you’ll want to start working on Grace of Growth levels. To improve our Grace of Growth to Level 3, we need to get 3 units to level 60.
For the 3 units to promote, it varies a bit since new players get a ton of units these days. Some good units to promote are Fenne, Mercedes, Ras, Lorina, Christy or any strong 5 stars you might have rolled from Milestone Chests (make sure they don’t suck). After you’ve promoted two units, you’ll unlock the ability to promote your ML Blessing hero (Arby/Ruele) who should be your 3rd promotion.
For the 4th and final part, we’ll finally be tackling Wyvern Hell. At this point we have the full Wyvern 13 team: Brieg, Furious, Muwi, Fenne/Sigret. This is the team we’ll be using for quite a while and with better gear, can approach a 99%+ clear rate with a pretty fast clear time of around 2-3 minutes. First we’ll be replacing Angelica with Brieg as he tanks Wyvern fine while also adding debuffs, and is used in way more PvE content. We’ll be unlocking Tamarinne soon, so Angelica serves little purpose and you should take her out of Grace of Growth. She can serve as a decent healer until you unlock Tamarinne though.
Get Brieg to level 60 with 6 awakens (good time to use the Awakening Elixir we received from the last set of missions) and we can put the gear we get from the missions onto him as well. This set of gear you can also just max out, it’ll work fine even as we move into mid-game PvE. For his artifact you can give him Steadfast Gatekeeper if you’ve managed to roll one, Proof of Valor from the Guild Shop, Sword of Ezera (just 1 copy) from the Hall of Trials shop, or a +0 Egg of Delusion/Envoy’s Pipe. For his skill enhancements, you’ll want to at least +3 his S3 for the -1 turn cooldown. +4 on his S1 is also nice for the CR push but you can save it for later. You can also enhance everyone’s gear and artifacts more if you want.
With this our Wyvern team is complete, you’ll eventually complete the 10 clears in a row mission as you farm Wyvern. I wouldn’t worry too much about consistency on your clears, a good amount of the inconsistency is a gear issue and we don’t lose stamina on failed clears anyways. Next we’ll be progressing other PvE content like Episode, Labyrinth, and Abyss.
Mid Game - Finishing PvE and early PvP progression
Now that you’re able to farm Wyvern Hell, you should take the time to learn how to manage all the gear you’ll be getting. Farming gear will never really stop, since you’ll need gear to build any units you want to use. Due to Speed Set being the most universally usable set, and you now having a lot of units to build, ideally you’ll want to stay in Wyvern for a while to get a good base of Speed Set gear. Eventually you can look at other hunts for more specific gear sets if certain units want those sets. Aside from farming gear, you’ll want to work towards clearing through more PvE content and pushing Arena a bit as well. The subsections here aren’t in a strict order.
We’ll be looking to push Episode, Labyrinth, and Abyss primarily. We can clear most of this using nothing but free units which will be covered in their respective sections. Expeditions are important as well since we’ve already unlocked them, though they do require a bit more units to be built. For your Hunt Challenges, I’d select Banshee first and clear Normal once using your Wyvern team to get the gear. Then I’d switch to Golem as it’s much easier to clear.
Gear/Crafting
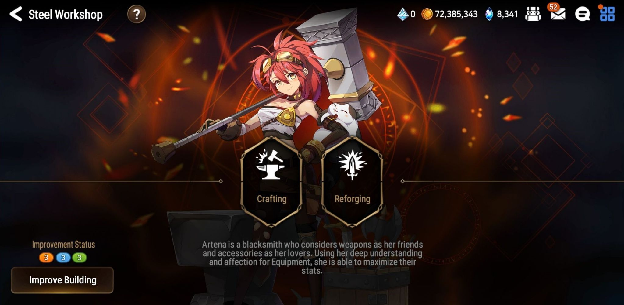
Any accessory (necklace/ring) pieces with bad substats on a bad set should be sold for dust to get exp. Bad substat gear on a good set should be extracted for Equipment Cores (explained later). For the other gear slots, you can either extract blues and sell pink+reds if you value gold more, or do the reverse if you value exp more (assuming the gear substats are bad). You should read the Gear Management Guide to help get an idea of what substat combos to look for in gear. There is also a Substat Roll Range and Reforge Substat Increase Table. In terms of determining what gear to reforge, it depends on what your gear standards are. At the start they should be pretty low since you won’t have much gear, but as you get a larger base gear pool, you’ll start looking specifically for upgrades and you’ll raise your standards as a result. You’ll generally want to aim to reforge any pieces that can be used even as your account gets better, I’d personally aim for at worst mid rolled pink pieces.

Extract gear with useful sets (like Speed) for Equipment Cores. You’ll need cores to use Equipment Conversion in the Alchemist’s Steeple, which lets you craft a red gear while selecting its main stat. This is where most of your right side gear is going to come from since it allows you to remove main stat rng, though the gems used in selecting mainstat are limited. You can get Conversion Gems in selector or random boxes from Guild Shop, World Boss, Transmit Shop, Automaton Tower and Expedition. Blue gems are flat stats and orange gems are % stats. The only blue gem you should take from a selector box is Speed, but if you get other gems from random boxes then you should use them. Equipment cores are also used to craft charms weekly in the Alchemist’s Steeple which is where you should use cores for bad sets such as Hit Set.
After you’ve maxed the Steel Workshop, you can use your crafting mats to make gear. You should only craft level 85 gear. I recommend crafting right side gear only if you need cores to make conversion gear. If you don’t need any cores you should craft left side since there’s no main stat rng, so you’re much more likely to get a good piece. Epic Crafting gives you a guaranteed red piece but you can’t select the main stat and should typically be used on left side gear.
In terms of what gear to put on units for early PvE, aside from the free gear you’re given, you can generally follow the rule of Speed Set and Speed main stat boots on all units. If they’re a tank, then focus Health (HP), Defense (Def), and if they have debuffs, Eff. Some tanks might want Effect Resistance (EffRes) as well, but those are much more specific. If they’re a damage dealer, then focus Attack (Atk), CritC, Critical Hit Damage (CritD), and if they have useful debuffs, Eff. You can check the Hero Journal Discord for recommended builds for a variety of units.
Episode
You’ll want to push through Episode 2 at the very least to unlock Ras’s SC, Adventurer Ras (ARas). ARas is an amazing unit for both PvE and PvP, and he’ll be a core unit for your progression through mid game. One thing to note is that one of his missions is to acquire 200 Greater Runes from Spirit Altar, so if there is a 2x Rune buff event coming up, you might want to unlock his SC immediately so you can get that out of the way during the buff event.
Episode 3 is a noticeable increase in difficulty from Episode 2, though we can get Tamarinne for free now, so that alone makes up for it. The missions will now ask for a Hero of a specific element or class, but you’ll no longer need to keep 3 Heroes alive which is nice due to the difficulty increase.
You can check the Episode Guide if you get stuck on any stages.
After clearing Episode 3 Chapter 10, you can get an upgrade to Meru, giving her 15% Atk, a 50% HP Revive, and her exclusive artifact “Magic for Friends”. Meru is still a solid unit for PvE without her upgrade and arti, but hey it’s a free stat boost.
Clearing Episode 4 Chapter 1 rewards you with Adin, who can be upgraded as you continue with the story. She can undergo 4 different specialty changes, though right now only her Earth form is any good. There are a bunch of missions you’ll need to clear to fully unlock Adin. You can find the best farming spots for these missions in the Specialty Change guide. There’s also a mission to promote her to 6 star at one point, so using a Potion of Ascension on her is a great investment. These missions will provide materials for her skill enhancements and skill tree, making her really easy to build.
There is an easy Zio One Shot for the final fight of Episode 4 as well.
Moonlight Theater
 Moonlight Theater is unlocked after clearing Episode 2 Chapter 10. After you clear the first Act in each story, a new Act will be unlocked after 1 week. You can use a Theater Ticket to skip the waiting period and immediately move on to the next Act. Theater Tickets are purchasable for 500,000 gold, or can be obtained if you own the ML units that feature in the story (one ticket per hero). You should use any tickets you get on Fallen Land to unlock the Moonlight Blessing. Each act rewards 50 Mystic Medals.
Upon completing the “Fallen Land” Act 1 and Act 2 stories, you will unlock the Fallen Land Moonlight Blessing if you’ve fully completed the first one. If you’re in a hurry to get the hero you could consider buying tickets to rush, otherwise just use the free entries. The notable missions here are clearing Episode 4 Chapter 10 and getting 4 units to level 60. You can use the easy to setup one shot for Episode 4 Chapter 10 in the section above if needed.
The Book of Memories

The Book of Memories is unlocked after clearing Episode 2 Chapter 10. This is where special side stories that will no longer be rerun can be found. It costs 1 Milestone in Time to unlock a special side story, which can be purchased in the Normal Shop for 900 skystones.
Path of Heir gives out two free Milestone in Time, beyond that none of them are mandatory and you should prioritize further mid-game progression first. Your first one should always be used “Bittersweet Dessert Festival” to complete Tamarinne’s Connection. Unfortunately this side story gives pretty bad rewards, but Tamarinne is worth it and Path of Heir requires her connection anyways (there’s a cute pet at least).
The few side stories I’d consider are the ones below. Imo Eulogy of a Saint then either Moon Festival for a PvE artifact or Small Miracle for skin tickets are the best choices. Ravenwing Manor can be a good choice if the units that use Chatty are in meta (not guaranteed).
Eulogy of a Saint: This one is unique since you want to make sure to not actually finish the side story. Keeping it open lets you access a stage for farming equipment dust which is one of the biggest gates in the game.
A Small Miracle: 40 skin tickets (used to purchase skins in the Skin Shop)
Reingar’s Chaotic Full Moon Festival: Midnight Bloom artifact (+8-16% CritC to all units, great for PvE)
The Holy Order of the Blue Cross and the Mysterious Island: Super Duper Water Shooter artifact (+5% Atk and +5-10% Eff, great for PvE). Also has a molagora, some filler Res gear, and a cute pet.
The Shadow of Ravenwing Manor: Chatty artifact (niche PvP Artifact)
Golem 13 (G13)
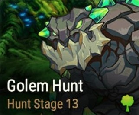
Golem drops Attack, Health, Defense, and Protection sets. It’s the next Hunt Challenge we’ll be looking to clear out, though we won’t be looking to farm it early as the sets are all PvP focused. The missions are extremely easy to clear once we get Tamarinne though and we can do it without building any useless units.
 Attack set is a useless set, increasing Atk by 45%. This set provides less value than both Speed set from Wyvern and Destruction set from Banshee. There’s a level 85 Atk set from Path of Heir, but we get so much Destruction and Speed gear that it’s not really a consideration either.
 Health set is a PvP set, increasing HP by 20%. This set is a good 2 piece set for tanks that don’t want Immunity set, Hit set, or Resist set. HP set matches Def, Hit, and Res set in value, so any of the 4 are usable on tanks that use the stats, but for units looking to hit high HP stats, this would be the ideal set. It’s not like you can’t use this in PvE but there’s little reason to actively farm it for PvE when it’s not going to be very important.
 Defense set is a PvP set, increasing Def by 20%. It's about the same as an HP set, but you’d look to use this on units that want to stack a ton of Def instead. This technically works fine in PvE it’s just way more units use HP set so you’re more likely to have that.
 Protection set is a PvP set, giving all allies a barrier worth 12% of the set holder’s HP. It’s good for defensive units to give your team a bit more survivability early, but it’s all front loaded since once the barrier is gone you don't have a set. It’s definitely not worth targeting early, but great on some units for RTA.
Your first priority should just be killing Golem a single time on Normal to unlock Cermia. This lets you get the free Destro + Pen gear which is great for any DPS. You should try to grab this gear as soon as you unlock Tamarinne. For your Normal clear use: Tamarinne, Adventurer Ras, Mercedes, and Arbiter Vildred, just give your DPS Daydream Joker.
For clearing the rest of the missions, I’d jump straight to clearing Hell since it’s really easy and this way we get better rewards for our energy spent. You can run Tamarinne, Adventurer Ras, Mercedes, and Cermia, for a very easy and consistent clear using only free units. Make sure Cermia and Mercedes have Daydream Joker and Cermia is in the back slot. Give Cermia the Destro+Pen gear we got from doing her missions and you can either max out her skills now or save it for Expeditions later.
Banshee 13 (B13)

Banshee drops Lifesteal, Counter, Destruction, and Resist sets. These sets are generally PvP focused though Destruction can be used for PvE as well. Generally you’ll be looking to farm these sets in Rift, but if you need Gold and Reforge mats, you might find yourself farming Banshee. It’s pretty easy to set up a 3 man one-shot for Banshee so I’d recommend doing that. If you can’t then just farm Wyvern/Rift.
 Lifesteal (LS) set heals for 20% of the damage dealt. Typically used on bruisers with some form of counter mechanic or a spammable high damage AoE. Units with some form of protection built into their kit while still dealing high damage can also benefit from LS.
 Counter set gives a 30% chance to counter when attacked. It is used on units with high impact S1s. While this set can be RNG, certain units gain a lot from having a chance at an extra S1 or already have their entire kit built around counters in the first place. You can also use this set just to be a nuisance.
 Destruction (Dest) set increases CritD by 60%. It can be used on both Bruisers and DPS units. Do keep in mind that 60% CritD from set and 70% CritD from necklace doesn’t give you a lot of wiggle room before you hit the CritD cap. Using a CritC neck has the same issue just with the CritC cap. You’ll want to make sure you dodge the caps, which is a bit easier on bruiser units compared to DPS since they use more stats. Certain bruisers use HP% main necklaces if you prioritize having higher HP more than the extra CritD. For DPS, an Atk% necklace can be used as well, you lose stat efficiency from the main stat (still better than Speed set for low/mid speed DPS though). For PvE you could use it to set up hunt one shots or as filler gear for DPS units.
 Resist (Res) set increases EffRes by 20%. It can be used by any unit that wants EffRes, especially units that want to stack a ton of it. Its efficiency is the same as HP and Def set, all 3 are 20%, so you can use this on units that just want a bit of EffRes as well if the rolls are good.
This is probably the lowest priority Hunt Challenge of the 3, purely because it’s a lot more annoying to clear Hell without building units that have low usage elsewhere. I’d at least clear Normal once and pick up Vivian so you can get the free Speed + Crit gear. For clearing Normal, you can actually just use your Wyvern team and it’ll clear with no issues. For Hell, I’d check the Banshee 13 Guide that covers everything you need to know regarding both slow clear and one shot.
Draft Arena
Draft Arena is unlocked at Rank 40. This is a baby World Arena where you fight with pre-built units and you can pick 1 of 3 at each pick (with 1 reset opportunity per match). You’ll need to do this a few times for Path of Heir as well. There’s no rewards from this or anything, it’s just a for fun mode.
Rift
Rift is unlocked at rank 50.
Rift dead
Royal Capital Akmakalis
Royal Capital Azmakalis unlocks when you reach account rank 60. There are 5 bosses at the ends of each pathway. The priority here is to kill Queen Azumashik so that you can unlock Azmakalis of Cycle. Her pathway is locked initially and will be unlocked after killing Devourer Arahakan. I also highly recommend getting 50% Exploration before you start doing Azmakalis of Cycle so that you can progress on the Journey to Succession missions (Cycle bosses can only be killed once a month).
These bosses are so low level you can largely ignore their mechanics, check the Normal Azmakalis of Cycle guide for a more detailed guide, I’m only going to go over Arahakan and Queen here.
The recommended units here are all free to acquire and used in multiple PvE content. The same teams will be used for Azmakalis of Cycle later as well.
Use Tamarinne, Brieg, Commander Lorina, and Mercedes to take out Devourer Arahakan. This fight is autoable but here’s a quick summary anyways. Kill the little spiders he summons then focus him. He’s immune to debuffs and has a lot of damage reduction until he gets a turn with both adds dead. You might want to heal up before dropping him below 50% HP and he’ll get an extra turn then use his S3.
Then this team for Queen Azumashik

For Queen, you can honestly just rush her down. Spam ARas S2 Soulburn into her, CLorina S3 Soulburn, Tamarinne S3, all the good stuff. Only thing to keep in mind is that the eggs will hatch after you first attack her, then after she drops below 50% HP. So you might want to make sure Tamarinne S3 is up to cleanse the debuffs (Iseria S2 helps alot here) though the fight is also really low level so you shouldn’t die anyways. When she’s below 50% HP, the bees have a chance to counter if you attack Queen while she’s buffed but the damage is low.
Expedition
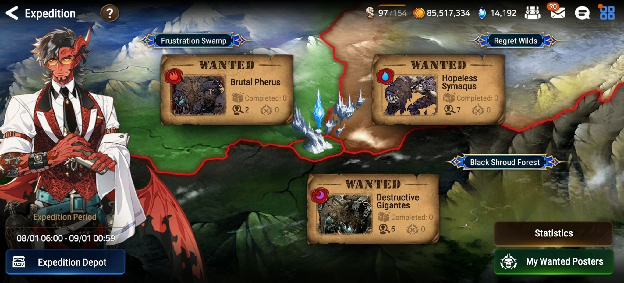
Expedition is unlocked after clearing any Hunt Normal stage. You can participate by getting Wanted Posters from farming Hunts or Rifts then posting them and by hitting other people’s posters. Even if you can’t clear posters, you should always use your free entry, even if you instantly yield, since you get gold for each entry. If you’re going to do this you should probably not invite others though, since there is a limited number of expeditions that you can be invited to.
If you have a strong guild and/or friends (and they’re okay with this), you can hit their posters even if you can’t do much damage and let other people clear it. In general, the goal is to do at least 350k damage on each Level 3 Expedition so that you can unlock Open Expedition. This lets you hit posters posted by any player who makes their poster public at the cost of only getting 60 points per poster instead of 80. Once you’ve unlocked Open Expedition, you can dump all your energy at the start of the month and try to finish the rewards early. Pushing for higher damage values is nice for trying to clear your own posters more consistently though since people tend to hit lower health posters.
There is an Expedition Guide that goes over the rewards, mechanics and typical team compositions.
Expeditions are the primary source of substat modification gems, which allow you to modify one substat on a +15 piece of gear to a different substat. You can only modify one substat, or to be specific one line, per gear. The roll ranges scale based on how many rolls went into the line and have diminishing returns.
There is a Substat Modification Reference Sheet, showing all of the possible roll ranges with some additional notes regarding its mechanics.

Arena (and Guild War)
At this point you’ll probably want to start pushing Arena in order to get more weekly skystones. This will also improve your performance in Guild War since there is a lot of overlap between units used in both places. Improving your Guild War attacks will increase your Armband and Mystic gain. Note that your defenses in both places will tend to get run over since offense is heavily favored, even more so in Guild War. The goal is to just make your defense annoying enough that people aren't going to want to hit it.
A basic arena offense team setup is 1 Healer, 1 Knight, 1 DPS/Bruiser and 1 flex unit. The flex unit can be an additional support or an additional DPS depending on the enemy team. For more specific help you should ask in the Discord since metas change too much for be to bother listing out the good units. For defense you should look to copy common top arena defenses by checking the “Total Ranking'' section in the “Ranking” tab on the right.
For Guild War offense you should generally just look to copy the teams of people who went before you. You’ll typically see the same teams being used on defense so if you get comfortable beating a common defense it’ll make it a lot easier for you in future attacks. For defense you could look to copy common defenses, any defenses that you felt were annoying to fight against, or just slam 6 of your best units that aren’t too squishy.
Much of Arena and Guild War offense is structured around the concept of “AI baiting”. This refers to using units with elemental disadvantage against the opponent to bait their AI into attacking said unit. Notable examples are Krau against Rimuru and Violet, or Magic Scholar Doris against Apocalypse Ravi. There are a few units that break the targeting rule though, with their S3s targeting the highest CR enemy instead.
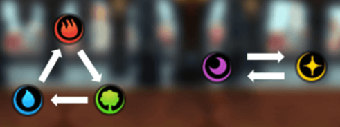
Aside from targeting the unit they have elemental advantage against, enemy units in PvP will then focus on units they are elemental neutral against. If there is no elemental stuff, they’ll target the unit with the lowest maximum HP%. If all units are full HP, they’ll target a unit at random. They also tend to not attack Invincible units even if they have elemental advantage, but they will still target units with Immortal or Skill Nullifier.
Advent Side Story



Advent is unlocked after clearing Episode 2 Chapter 10. Despite the early unlock, it’s being listed all the way down here since it’s generally considered to be mid to late game content. You’ll need at least 9 units and the harder difficulties can be very challenging. This typically comes around every few months and lasts 3 weeks. There are currently 3 different Advents in rotation.
Advents are a great source of substat modification gems and have a bunch of other rewards in the shop as well. Clearing a stage will net you a random mod gem and some event currency. Each Advent side story has 6 gear sets associated with it. These 6 sets will determine the sets for the mod gems that you get as a drop from clearing stages, the random greater mod gem items in the shop, and the mod gem selector chests in the shop as well. The currency can be used in the shop to purchase the items mentioned earlier as well as some elemental bookmarks and other stuff.
The fight consists of a single boss with 3 separate phases. Each phase is fought using 3 unit teams that you have to set up before you enter the fight. There are 3 difficulties: Hard, Hell, and Epic Hell. Hard is typically clearable without much issue, but you’ll need to at least have the gear for 9 different units. Hell and Epic Hell are where it starts to get a bit harder, especially if you don’t have a lot of units and gear. Hard and Hell drop the same type of currency so it’s not a big deal if you can only clear Hard (Hell is just more energy efficient). Epic Hell can only be cleared 3 times.
Here are the existing Advents and their guides:
Kiss of Frost (Elisia of the Ice)
Enraged Blazing Emissary (Dazzled Magnar)
Nature’s Decline and Decay (Decaying Naturas)
Trial of the Constellations
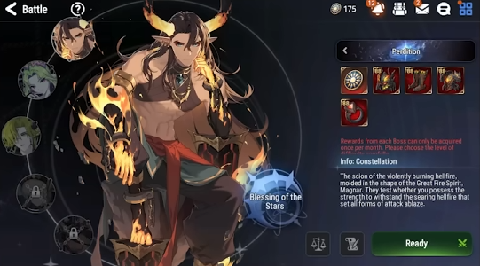
Trial of the Constellations (ToC) is unlocked upon reaching account rank 50. The content has 5 bosses which you have to beat. Every 6 months we enter a new season for ToC and with each new season the blessings and mechanics are changed. There are 4 difficulty levels which you can choose from for each boss separately. Hard/Hell/Nightmare/Perdition. You only get the rewards for the first clear of each refresh. Meaning if you beat Hell difficulty for Aquina and get the rewards, then you won’t get any rewards if you go on and beat Nightmare afterwards. At least until ToC refreshes again in 6 weeks. So, it is recommended to just beat Nightmare because it is easy enough to do and the rewards are the same as Perdition. At most you just need to do Perdition once throughout the entire season for the bonus currency from Reputation. This guide won’t cover the mechanics for the bosses since Mori already covers those on his Youtube channel.
However, we will go through everything else. You should do this content every time it is in rotation because the rewards are extremely good and it is not that difficult when you are in the latter parts of your PvE progression. If you click “Blessing of the Stars” on this page in game then it will take you here.
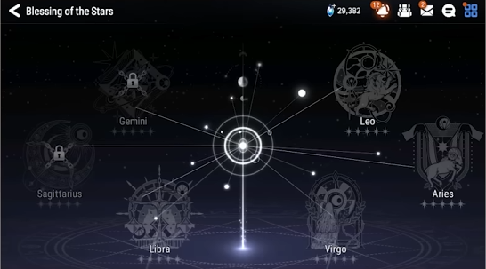
This is what we refer to as Blessings. These are essentially buffs which make the fight easier and in some cases are a must have. When you click on a blessing it will take you to this page of the corresponding blessing. Now we will talk about how you access those buffs.
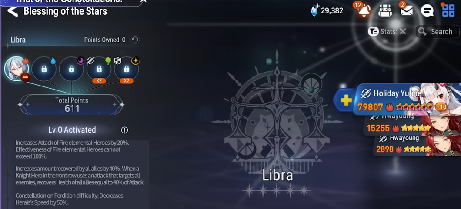
There are 5 slots on each blessing. At first only one slot is open. But you can unlock more slots by spending blessing points which you get from defeating the bosses. Each hero with gear and artifact you place in gives you points. And at certain point thresholds you upgrade the blessing level and unlock the corresponding buffs. You can’t just place any hero. The hero must correspond to the zodiac sign and element. For example in this libra section for the fire element we have Adventurer Ras slotted in. Why is he eligible? Because he is a fire element character with the libra zodiac sign. The 4th and 5th slot also need to be a specific class. But in exchange they give double the amount of points. So for the 4th slot here you’d need an earth warrior who has the libra zodiac sign. This video goes over the ways to get the most points and what kind of gear you need. Also you get molagora from here when you eventually fill out all your blessings. Doing ToC gives you Starfall Coins  which you can use in the Trial of the Constellation Shop alongside some gear.
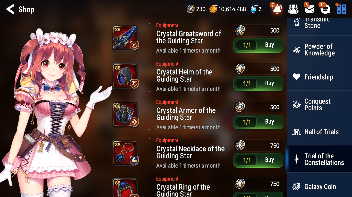
The shop can be accessed from Lobby>Shop on the right side of your screen>Scroll down to find Trial of the Constellations.
Late Game - Gear Gear Gear
At this point you’ve cleared through all of the easy PvE content and made decent progression into PvP. You have the choice of focusing on what you want, so do whatever you like the most whether it’s PvE, PvP, or both.
World Arena (RTA)
World Arena (you’ll only ever hear it called RTA) is unlocked at Rank 60. This is where you compete against other players in real time. It’s very different from Arena and GW since you can’t just abuse the enemy AI and your opponent will be able to pick units that counter whatever you pick as well.
Before anything else, first go to the E7WC tab after you open RTA and claim the free gear.
Even if you aren’t able to go far in RTA, it’s always worth at least doing your placements since you’ll get some Conquest Points for ending in Bronze, Silver, or Gold. You should also try to end in Master for a sweet skin for an ML5, regardless of if you own it or not as they are considered Epic Skins which means they cost a bit more in the skin shop.
Valky, a Legend RTA player, has created a video series going over drafting in RTA. While the meta constantly shifts, the general principles should stay the same. You can learn a lot more about RTA by watching streams as well, since you’ll get to see a wider variety of matches and you can learn more about why certain units are picked.
The biggest tip we can give you is just try! There is no punishment for losing and you can learn a lot!
Wyvern One Shot
One Shot teams aren’t that valuable these days since Rift is a much better source of gear. For anyone who wants to set one up anyways, see below.
These two videos cover W13 one shot in its entirety except for Straze/WSchuri setups.
Clarissa, Sinful Angelica, Ken/Camilla/Karin, Rem/Sigret
Seaside Bellona/Aria, Sinful Angelica, Ken/Camilla/Karin, Rem/Sigret
The link below is for the Straze setup if anyone is interested.
Ian, Seaside Bellona, Watcher Schuri, Straze
- Win rate varies depending on how many limit breaks you have on Song of Stars (SoS) and your SSB’s Eff. If SSB S1 dual attacks with Straze and makes him cut Ian, your run will fail if SSB doesn’t land Target. Due to this, your SoS should ideally be on SSB and she should have 65 Eff. There’s also a chance that SSB or Ian dual attack with each other, giving you more Target chances. Assuming 65% Eff SSB and +15 SoS, the clear rate is 85.3%. With a +30 SoS, the clear rate is 93.9%. If you have an extra SoS, it will boost your winrate to 97.8% at +15 and 99.1% at +30. These win rates don’t include the dual attack stuff because I’m lazy.
- SSB needs 184 Spd to consistently outspeed wave 1.
Azimanak 13 (A13)

Azimanak (Azi) drops Immunity, Rage, and Unity sets. While Immunity set is still really good and Rage is nice to have, Azi isn’t as valuable anymore. We can get by without Rage set in PvE these days especially since new players get so much good Destro + Pen gear early. Immunity set is the other valuable set here, mostly for PvP. You can also just farm these in Rift instead of the Hunt.
 Rage set increases damage dealt by 30% against debuffed enemies. It provides much more damage compared to Destruction Set, making it the best damage set for PvE if you can guarantee debuffs. This makes it very valuable for setting up hunt one shots or even just making standard hunt clears a bit faster. You could also use this to increase your Expedition damage if you like seeing big numbers.
 Immunity (Imm) set gives a 1 turn Immunity buff at the start of combat. It’s primarily a PvP set to help protect against debuffers. It’s incredibly strong against units with debuffs but no strip on their first turn, though even if they have a strip it adds another layer of 15% (unless ignore EffRes Soul Burn). You do sacrifice stats from not running other 2pc sets, but it’s definitely worth it depending on the units in meta.
 Unity set increases your dual attack chance by 6%. Dual attack is very inconsistent so it is typically unused in favor of Crit or Penetration Set for their consistent value. You could opt to run it on units with very strong S1s or strong passives that are activated by S1 for fun.
There is an Azimanak 13 Guide that covers everything you need to know regarding both slow clear and one shot.
Caides 13 (C13)

Caides is the hardest and most annoying hunt to farm which is why we leave it for last. At this point, with Rift being available, that’s by far the best spot to get any Caides sets you need. With Quick Battling, this is the best hunt to use for that since it’s an absolute pain to farm.
 Penetration set makes single target attacks penetrate the enemy’s Def by 15%. This is the best 2-set for single target DPS/Bruisers that don’t run Imm set. Crit set would be the budget set if you don’t have Pen set, but it provides considerably less damage.
 Torrent set increases damage dealt by 10% and reduces HP by 10%. This set is good on any DPS that doesn’t want any sort of bulk and doesn’t use Pen set. It’ll out damage Crit Set, but any unit that only has single target attacks will still want Pen Set. The HP effect reduces the unit’s total HP rather than inflicting damage at the start of combat.
 Injury set is used in PvP, decreasing the enemy’s max HP by up to 6% (12% if a single target attack was used) according to damage dealt. It’s a pretty niche set, but good if you’re trying to counter an HP scaling unit.
 Revenge set increases spd by 12% and for every 1% of hp lost, increases spd by another 0.5%. It is unused due to Spd set not having to deal with the weird hp threshold conditions. Some people use it on tanks, but it’s not really better than Spd set for any of them. If you happen to have a good set lying around you can toss it on a lower priority unit to free up Spd set gear for a better unit.
The best way to farm Caides is to farm Rift instead. If you want to farm it really badly, check the in game statistics for team comps for slow clear. For fast clear / one shot you can check the #caides channel in the Hero Journal Discord.
Dagger Sicar
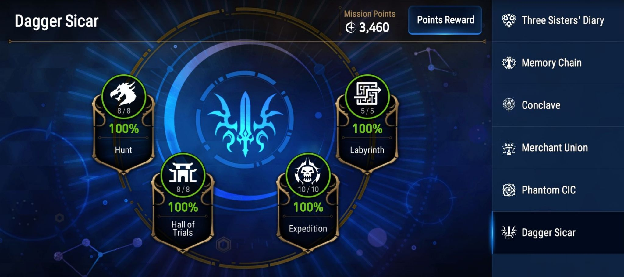
Dagger Sicar is unlocked at Rank 65. It is a set of challenge missions that give one time rewards. In my opinion the Expedition rewards the most important ones since they give conversion reforge materials and powder. Teams for this are available in the Expedition Guide. Maybe I’ll make a guide for the rest eventually… For now you can just look up teams on YouTube or something.